Project 5a: Power of Diffusion Models

Safaa Mouline

Overview

Using the diffusional model, DeepFloyd IF, I generated and edited images and created optical illusions!

Part 0: The Setup

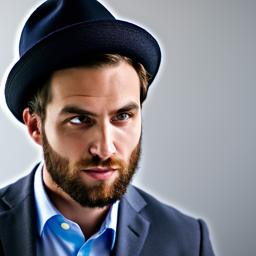
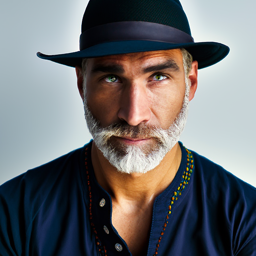
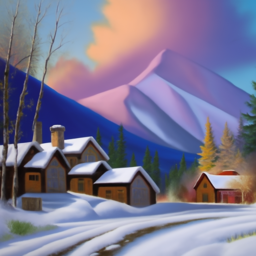
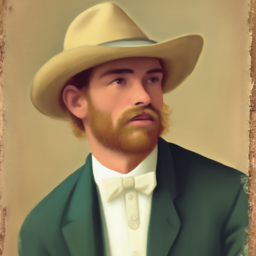
In this part of the project, we are using the DeepFloyd IF diffusion model. I sampled images from the model with the following prompts, using a seed of 180.

The following is for 10 inference steps:

10_steps_output_0
an oil painting of a snowy mountain village
10_steps_output_1
a man wearing a hat
10_steps_output_2
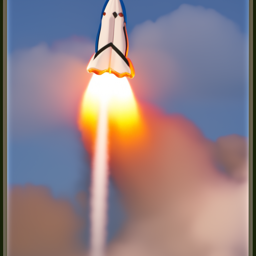
a rocket ship

The following is for 20 inference steps:
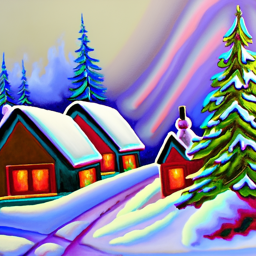
20_steps_output_0
an oil painting of a snowy mountain village
20_steps_output_1
a man wearing a hat
20_steps_output_2
a rocket ship

The following is for 100 inference steps:
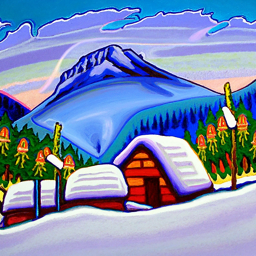
100_steps_output_0
an oil painting of a snowy mountain village
100_steps_output_1
a man wearing a hat
100_steps_output_2
a rocket ship

As you can see the images become more realistic/natural looking as the number of inference steps increases.

1.1: The Forward Process

The forward process involves taking a clean image and adding gaussian noise to it. These are timesteps from 0 to 999, with 0 corresponding to the clean image, and an increasing t resulting in increased noise. Here is the campanile at the following timesteps.

campanile_resized
Campanile Resized
noised_t_250
t = 250
noised_t_500
t = 500
noised_t_750
t = 750

1.2: Classical Denoising

With just a simple gaussian blur filter to get rid of high frequencies, we get the following. Not so great...

noised_t_250
Noise t = 250
noised_t_500
Noise t = 500
noised_t_750
Noise t = 750
gaussian_t_250
Gaussian Denoised t = 250
gaussian_t_500
Gaussian Denoised t = 500
gaussian_t_750
Gaussian Denoised t = 750

1.3: One Step Denoising

Using the UNet, in one step, we can estimate the noise in a given image, and use that to calculate the clean image.

campanile_resized
Original Image
noised_t_250
Noised Step 250
noised_t_500
Noised Step 500
noised_t_750
Noised Step 750
one_step_250
One Step Denoising at 250
one_step_500
One Step Denoising at 500
one_step_750
One Step Denoising at 750

1.4: Iterative Denoising

When there is a lot of noise, one step denoising doesn't do quite well. But if we implement iterative denoising (at strided timesteps to make it more computationally inexpensive), we can do much better. In iterative denoising, we predict the noise in the previous timestep until we reach the clean image.

iterative_at_90
Iterative at Step 90
iterative_at_240
Iterative at Step 240
iterative_at_390
Iterative at Step 390
iterative_at_540
Iterative at Step 540
iterative_at_690
Iterative at Step 690
campanile_resized
Campanile Resized
iterative_denoised
Iterative Denoised
one_step_compare
One Step Compare
gaussian_compare
Gaussian Compare

1.5: Diffusion Model Sampling

Passing in random noise into the diffusion model, we can generate images with the text prompt "a high quality photo".

sample_0
Sample 1
sample_1
Sample 2
sample_2
Sample 3
sample_3
Sample 4
sample_4
Sample 5

1.6: Classifier Free Guidance (CFG)

CFG produces much more natural images by using both a conditional noise estimate (based on a prompt) and an unconditional noise estimate (null prompt). Here are some samples using CFG.

cfg_sample_0
CFG Sample 1
cfg_sample_1
CFG Sample 2
cfg_sample_2
CFG Sample 3
cfg_sample_3
CFG Sample 4
cfg_sample_4
CFG Sample 5

1.7: Image-to-image Translation

The SDEdit algorithm serves to "edit" photos through adding noise and projecting it back to the natural image manifold. Here are some Berkeley themed images using this algorithm at different noise levels.

im_to_im_1
SDEdit i_start = 1
im_to_im_3
SDEdit i_start = 3
im_to_im_5
SDEdit i_start = 5
im_to_im_7
SDEdit i_start = 7
im_to_im_10
SDEdit i_start = 10
im_to_im_20
SDEdit i_start = 20
campanile
Campanile
im_to_im_1
SDEdit i_start = 1
im_to_im_3
SDEdit i_start = 3
im_to_im_5
SDEdit i_start = 5
im_to_im_5
SDEdit i_start = 7
im_to_im_7
SDEdit i_start = 10
im_to_im_10
SDEdit i_start = 20
im_to_im_10
Sather Gate
im_to_im_1
SDEdit i_start = 1
im_to_im_3
SDEdit i_start = 3
im_to_im_5
SDEdit i_start = 5
im_to_im_7
SDEdit i_start = 7
im_to_im_10
SDEdit i_start = 10
im_to_im_10
SDEdit i_start = 20
im_to_im_10
Doe

1.7.1: Editing hand-drawn and web images

We can use this SDEdit algorithm to edit images that are not "natural" looking (aka drawings, etc.)

mona_1
Mona at i_start = 1
mona_3
Mona at i_start = 3
mona_5
Mona at i_start = 5
mona_7
Mona at i_start = 7
mona_10
Mona at i_start = 10
mona_20
Mona at i_start = 20
mona_resized
Mona Resized
flower_1
Flower at i_start = 1
flower_3
Flower at i_start = 3
flower_5
Flower at i_start = 5
flower_7
Flower at i_start = 7
flower_10
Flower at i_start = 10
flower_20
Flower at i_start = 20
flower_drawn
Flower Drawn
snowflake_1
Snowflake at i_start = 1
snowflake_3
Snowflake at i_start = 3
snowflake_5
Snowflake at i_start = 5
snowflake_7
Snowflake at i_start = 7
snowflake_10
Snowflake at i_start = 10
snowflake_20
Snowflake at i_start = 20
snowflake_drawn
Snowflake Drawn

1.7.2: Inpainting

Implementing the RePaint paper, we can edit specific areas of an image, using a mask. The following show the mask, what's to be edited, and the edits. I think it's kind of cool what the model hallucinates. For sather gate, you can see it added a person walking by and for the doe photo, it added a chandlier, both of which are pretty realistic edits.

campanile_resized
Campanile Resized
campanile_mask
Campanile Mask
campanile_replace
Campanile Replace
campanile_inpainted
Campanile Inpainted
sather_gate_resized
Sather Gate Resized
sather_mask
Sather Mask
sather_replace
Sather Replace
sather_inpainted
Sather Inpainted
doe_resized
Doe Resized
doe_mask
Doe Mask
doe_replace
Doe Replace
doe_inpainted
Doe Inpainted

1.7.3: Text-conditional image-to-image translation

Earlier, the image-to-image translation was just projecting to the natural image manifold. Here, we guide it with more specific prompts. The prompts are "a rocket ship", "an oil painting of a snowy mountain village", and "a lithograph of waterfalls". Sather gate in a snowy village is my personal favorite (i_start = 20).

im_to_im_1
Rocket at i_start = 1
im_to_im_3
Rocket at i_start = 3
im_to_im_5
Rocket at i_start = 5
im_to_im_7
Rocket at i_start = 7
im_to_im_10
Rocket at i_start = 10
im_to_im_20
Rocket at i_start = 20
campanile_resized
Campanile
sather_1
Snowy village at i_start = 1
sather_3
Snowy village at i_start = 3
sather_5
Snowy village at i_start = 5
sather_7
Snowy village at i_start = 7
sather_10
Snowy village at i_start = 10
sather_20
Snowy village at i_start = 20
sather_20
Sather Gate
im_to_im_1
Waterfall at i_start = 1
im_to_im_3
Waterfall at i_start = 3
im_to_im_5
Waterfall at i_start = 5
im_to_im_7
Waterfall at i_start = 7
im_to_im_10
Waterfall at i_start = 10
im_to_im_20
Waterfall at i_start = 20
campanile_resized
Doe

1.8: Visual Anagrams

If you get noise a estimate from the diffusion model for one prompt (epsilon_1), flip the current image and take another noise estimate with a different second prompt (epsilon_2) and flip it, you can average these two to be the noise estimate for a visual anagram (i.e. an image that looks like one thing in one orientation and another when flipped). This makes a lot more sense when looking at the examples below.

final_illusion
an oil painting of people around a campfire
flipped
an oil painting of an old man
snowy_old_man_1
an oil painting of a snowy mountain village
flipped
an oil painting of an old man
snow_coast
an oil painting of a snowy mountain village
flipped
a photo of the amalfi coast

1.9: Hybrid Images

If you pass the noise estimate from one prompt through a low pass filter and a noise estimate of another prompt through a high pass filter and add them to iteratively denoise, you can get a hybrid image! The prompt associated with the low pass of epsilon can be seen from afar while the one associated with the high pass can be seen up close.

waterfall_skull
Hybrid: Waterfall, Skull
snowy_skull
Hybrid: Snow Village, Skull
snowy_coast_hybrid
Hybird: Snowy Village, Coast
Go to Part B